|
Replacing Fork Oil |
|
The following is for changing the fork oil in
the left side fork leg, these are guidelines
only and if you are unsure of any part
of the procedure please consult your motorcycle
dealer. www.xr650r.co.uk cannot be held
responsible for any damage or lose from
following these instructions. |
|
First things first clean the front of your bike
and have a suitable bench or clear area to place
all the parts you are going to remove, raise the
front of the bike and secure using a suitable
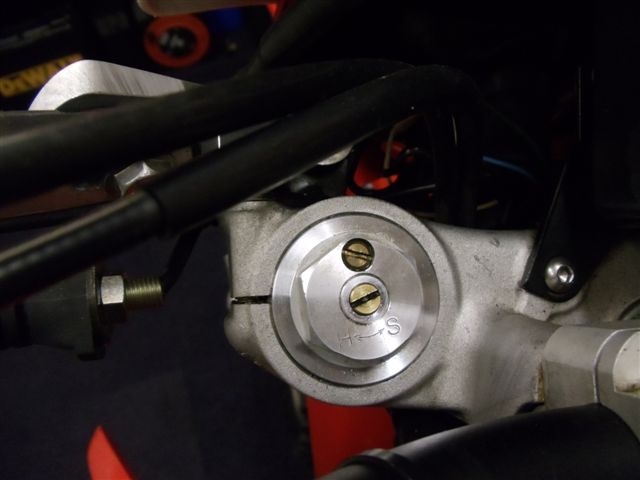
jack. Using a 30mm socket or ring spanner crack
the top cap nut but there is no need to undo it
any more @ this stage. Its also a good idea to
undo the damper screw...this is the middle screw
turn it anti-clockwise till it stops; look
closely at the top it has an arrow pointing
towards the letter "S" |
|
|
 |
|
|
|
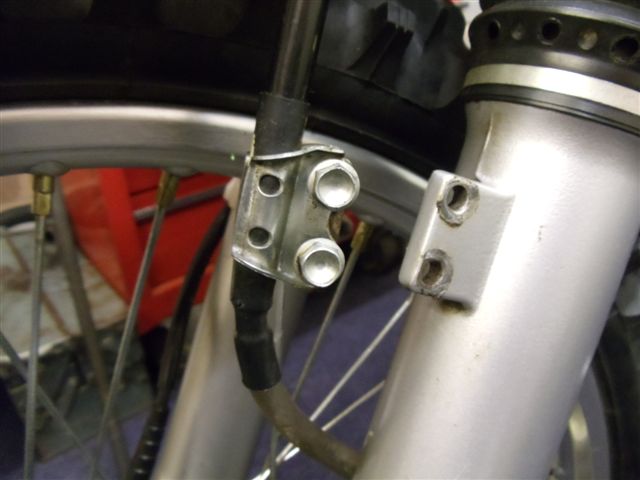
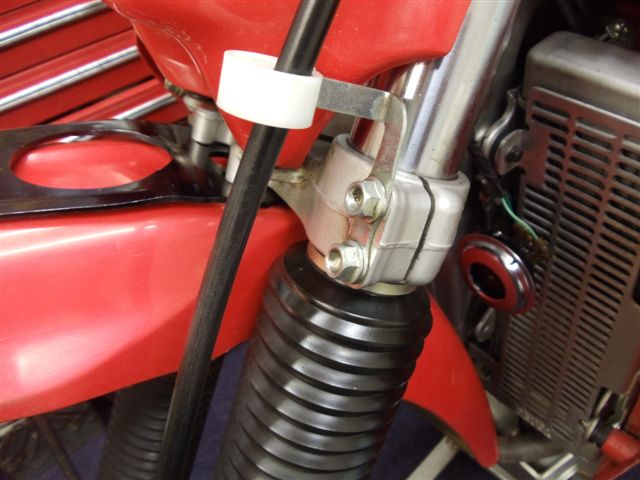
Now remove the 2 screws holding the front brake
hose to the fork leg using a 12mm spanner or
socket, keep them safe by screwing them back
into the clamp as shown below. |
|
|
 |
|
|
|
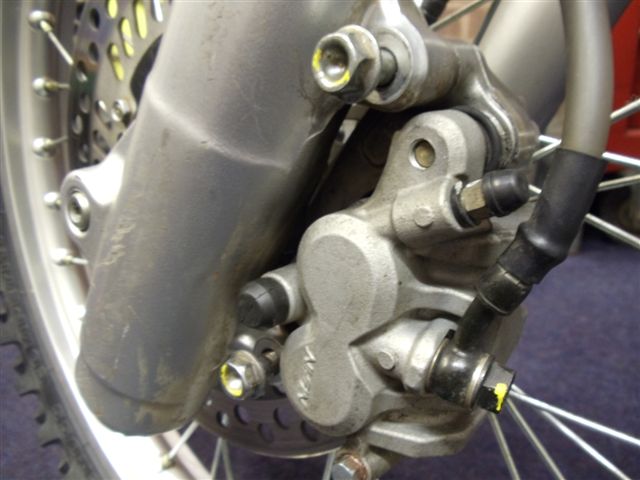
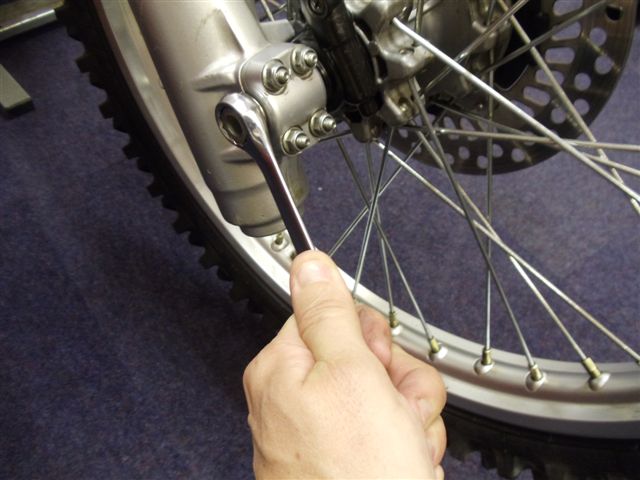
Now, remove the calliper fixing bolts, again 12mm once
these are removed slide the calliper backwards
and off the disc. Screw the 2 bolts back into
the calliper (Note they are different lengths)
Picture bellow shows the 2 pins slightly undone. |
|
|
 |
|
|
|
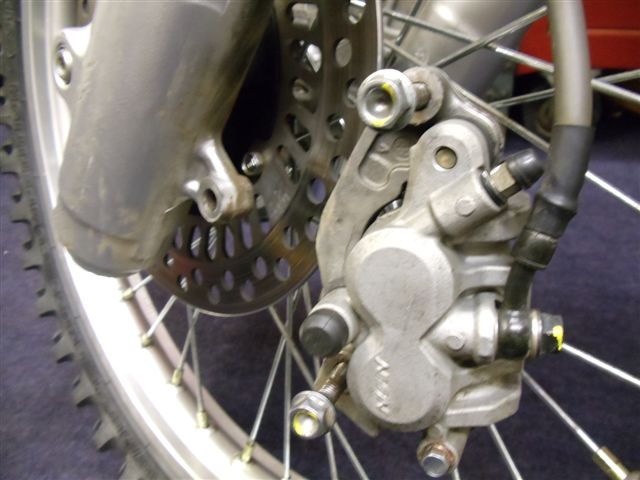
Here you can see the 2 bolts are screwed back
into the calliper for safe keeping. |
|
|
 |
|
|
|
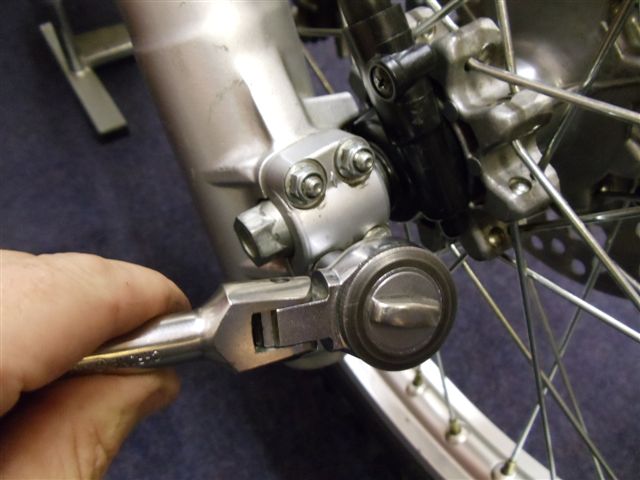
Moving up the fork leg slacken the 2 12mm pinch
bolts on the lower triple clamp. |
|
|
 |
|
|
|
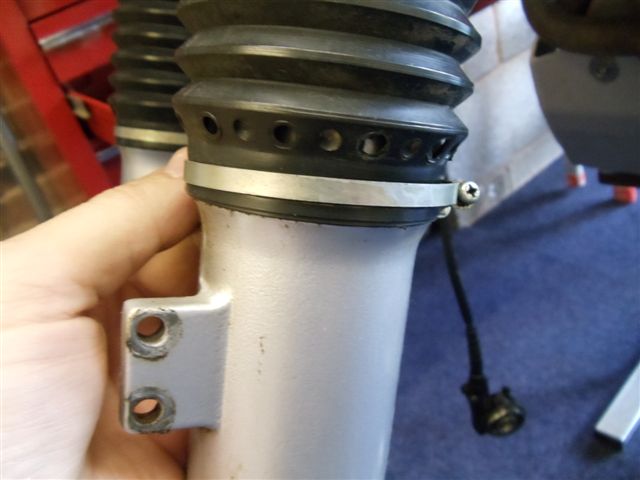
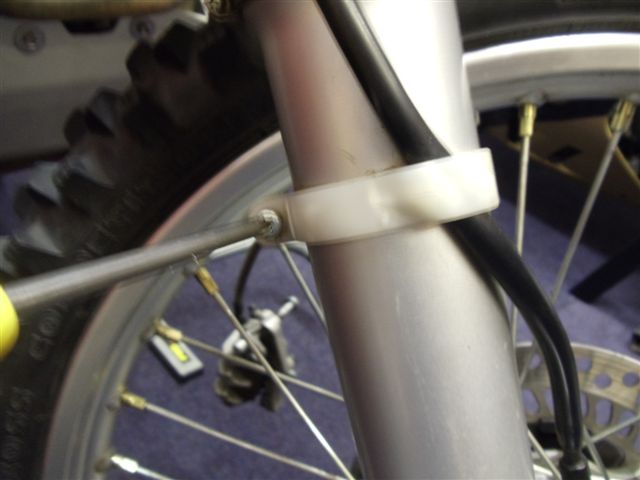
Slacken the fork gaiters holding clips using a small
Philips screw driver, there is no need to undo
these completely...you will only lose the screws. |
|
|
 |
|
|
|
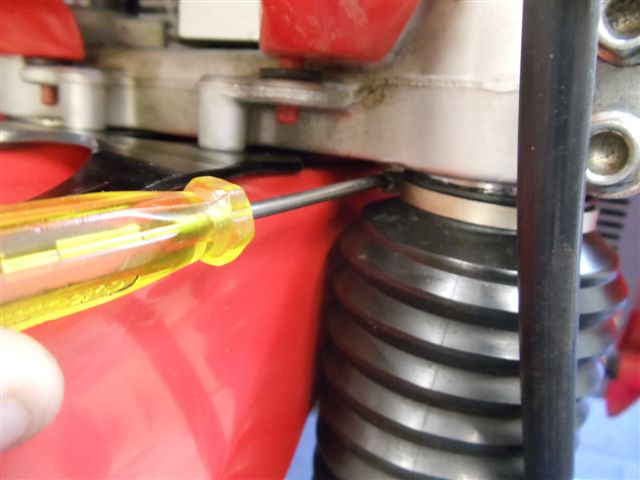
Top clip hidden around the back :). |
|
|
 |
|
|
|
Now you're ready to remove the front wheel, using a 10mm
spanner or socket slacken the 4 spindle
clamp bolts, there is no need to remove these
just undo them till they are loose. |
|
|
 |
|
|
|
Next using a 17mm spanner or socket undo the spindle
bolt, once this is completely undone support the
front wheel and carefully pull the spindle out
towards the Speedo side, disengage the Speedo
drive from the front wheel hub and lift the
wheel away. |
|
|
 |
|
|
|
If required you can undo the Speedo cable clip as
shown below. |
|
|
 |
|
|
|
Now slacken the top triple clamps pinch bolts and
remove the fork leg, this is the hard part as it
won't simply drop through, you might need to tap
the top of the fork leg with a soft mallet, but
it will eventually drop through both yokes, lift
the leg clear of the bike and slide of the
gaiter and the 2 holding clips |
|
|
|
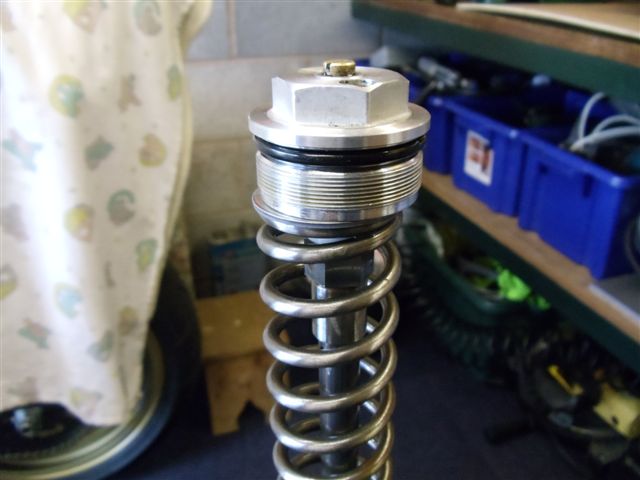
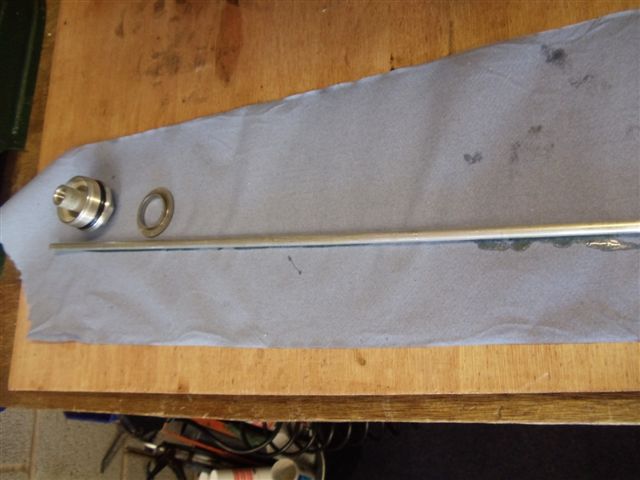
Now with the fork leg held upright, undo the top cap,
normally this is only hand tight, don't worry
nothing will spring out and get you, you will be
left with this once its undone. |
|
|
 |
|
|
|
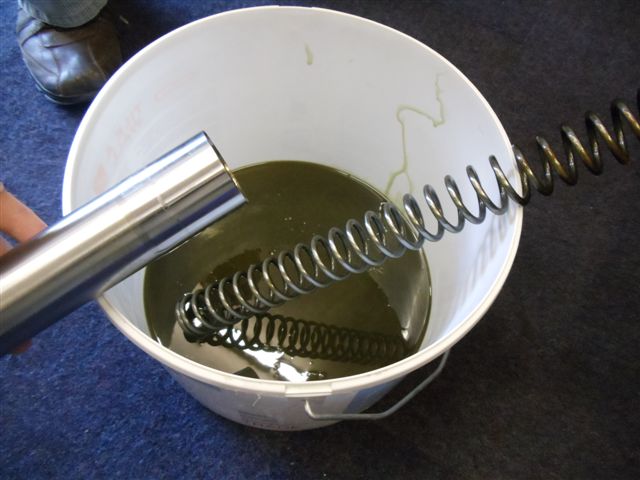
Now using a 17mm open ended spanner hold the
inner nut and again using the 30mm spanner or
socket crack the joint free, it won't be very
tight, carefully remove the top cap from damper
rod along with the spring retaining washer.
Slide the spring off the piston rod and allow it
to drain in a bucket. |
|
|
 |
|
|
|
The piston rod will now retract back into the fork
tube but don't worry we can rescue it later,
remove the damper adjuster...that's the short
rod and the long plain rod from the piston rod;
place these somewhere clean and safe. |
|
|
 |
|
|
|
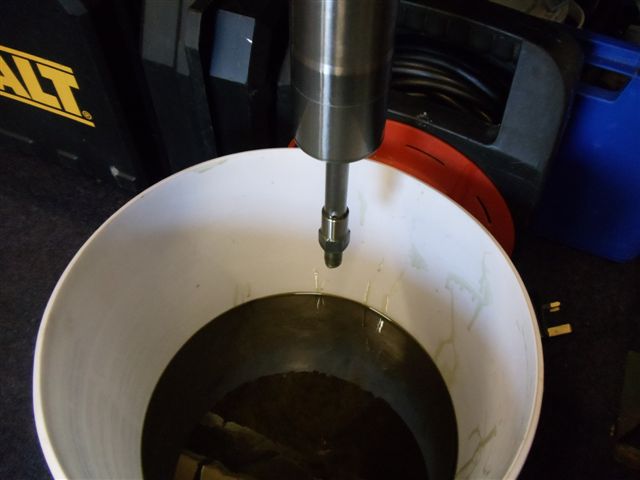
Now if you haven't' already done so start draining the
oil from the fork leg, this isn't hard but time
consuming as you need to get the oil out of the
lower fork where the damping action is
generated. Just keep pushing the piston rod back
and forth within the fork leg and keep working
the oil out of the leg, bit like milking a cow.
You will know when it is all out the piston rod
will simply fall and go clunk when lifted up
and released... there will be no oil damping. |
|
|
 |
|
|
|
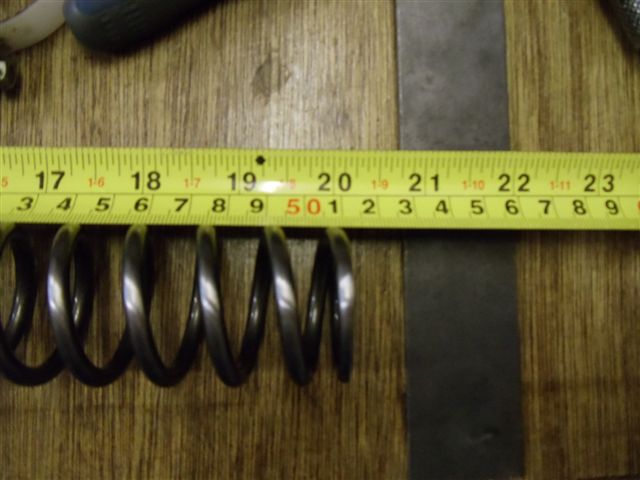
Dry the spring and check it's length, service limit is
496mm, mine measured 509mm which is slightly
above the stock size of 506mm ? |
|
|
 |
|
|
|
With the fork leg held upright insert the long
damper rod and the adjuster rod as shown below,
remember the damper adjusters slot faces
downwards, do not slide the spring in yet. |
|
|
 |
|
|
|
Next you will need your fork oil, the book says
just that "Fork Oil" I use Silkolene Pro RSF 5wt
which is a light oil and should offer a good
soft ride over medium to rough ground. Now they
also say to use 637ml of oil per leg but I did
some research on this and the majority of riders
say fill to a physical level rather to a volume,
the book also states the oil should be set 120mm
from the top of the fork tube when fully down
see below. Tip your fresh oil into the fork leg
and try and get as much as you can down the
centre hole, once it starts to fill up pull the
piston rod up and down until the lower section
is completely full of oil and you can feel a
full damping action. |
|
|
 |
|
|
|
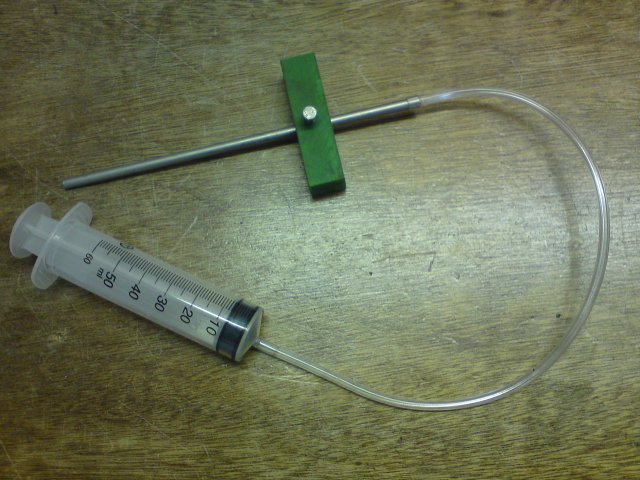
Now to make things easier and make sure both
legs have exactly the same amount of in I made
this little device, copied it off the internet.
By setting the long tube at 120mm and inserting
this into the fork leg I can suck out any excess
oil as soon as the level reaches the end of the
tube the suction stops and I know my oil level
is exactly 120mm as required, this makes setting
both fork oil levels the same dead easy. Check
out eBay they are on there for a few pounds. |
|
|
 |
|
|
|
Once you have the correct oil level, insert the
spring, the fun part is lifting the piston rod
up the middle of the spring all the way to the
top, what you can do is using your 17mm spanner
hold this on the lock nut flats and wind the
spring around this will cause the locknut and
spanner to rise up the spring. As soon it pokes
out of the top place the spring washer on top of
the spring and screw the top cap on to the
thread, once the threads catch you can relax and
simply tighten the top cap all the way down onto
the thread, when it stops use the 17mm spanner
and the 30mm spanner and lock the 2 together,
nothing mega tight just firm. Now screw the top
cap into the fork tube and hand tighten as much
as possible. Slide the fork gaiters back on to
the leg and the clips and then insert the fork
into the triple clamps, ensure the top cap comes
fully through the upper triple clamp then
tighten the pinch bolts, DO NOT OVER TIGHTEN
THESE BOLTS. 27N-m for the top and 32N-m for the
lower. Reassemble the rest in the reverse order,
don't forget to set your damper, screw the
rebound damper screw all the way clockwise till
is stops then anti-clockwise 9 clicks this is
the stock setting. |
|
|
